homemade

The Ultimate Guide to Homemade Bread

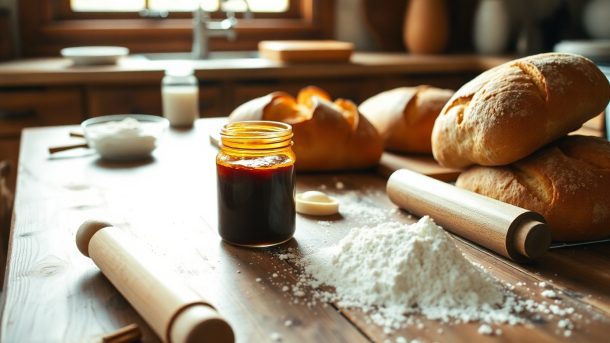
As you begin on the journey to create your own homemade bread, you’ll discover the joy of working with dough and the satisfaction of biting into a warm, freshly baked loaf. Your kitchen will soon be filled with the enticing aroma of yeast and flour, making your mouth water in anticipation. With this guide, you’ll learn the simple steps to making delicious homemade bread, and before long, you’ll be baking like a pro, creating mouthwatering treats to share with family and friends.

Choosing the Right Ingredients

Before you begin your bread-making journey, it’s vital to select the finest ingredients. Your choices will greatly impact the flavor, texture, and overall quality of your homemade bread.

Selecting Quality Flour

Flourishing with possibilities, flour is the foundation of your bread. You’ll want to choose a high-protein flour, such as bread flour or all-purpose flour, to ensure your bread has a good structure and rise.

Yeast and Salt: The Essential Duo

Acquiring the right yeast and salt is vital to your bread’s success. You’ll need active dry yeast to help your dough rise, and salt to enhance the flavor and control yeast growth.

At the heart of every great bread is a harmonious balance of yeast and salt. As you mix and knead your dough, you’ll notice the yeast fermenting, producing carbon dioxide bubbles that give your bread its light, airy texture. Meanwhile, the salt will subtly enhance the flavors, bringing out the best in your other ingredients. You’ll find that with the right combination of yeast and salt, your bread will be infused with a depth of flavor and aroma that’s simply irresistible.

Preparing the Dough

One of the most satisfying steps in bread-making is preparing the dough, as you get to witness the transformation of simple ingredients into a beautiful, pliable mass. You’ll be combining flour, yeast, water, and other ingredients to create a dough that’s just right for shaping and baking.

Mixing and Kneading Techniques

Behind the scenes of great bread is a good mix, and you’ll want to develop a technique that works for you, whether it’s using a stand mixer or getting in there with your hands to knead the dough until it’s smooth and elastic.

Allowing the Dough to Rise

Beside your mixing bowl, you’ll need a warm, draft-free spot for your dough to rise, where it can relax and let the yeast do its magic, causing the dough to expand and develop that lovely, airy texture you’re aiming for.

Affecting the rise of your dough is the temperature, humidity, and time you give it, so you’ll want to make sure you’re providing the right conditions for your yeast to thrive, and then patiently waiting for your dough to reach its full potential, doubled in size and ready to be shaped into your desired loaf.

Shaping the Loaf

All the hard work of mixing and rising comes down to this moment: shaping your loaf into a beautiful, inviting form. You’ll want to gently coax your dough into the shape you desire, taking care not to overwork it.

Forming the Perfect Boule

Lovely boules are a delight to create, and you’ll find that shaping them is quite straightforward. You’ll simply shape your dough into a round, tucking the edges under to create a smooth, even surface.

Creating a Beautiful Baguette

By now, you’re probably eager to try your hand at crafting a classic baguette. You’ll start by shaping your dough into a long, thin rectangle, and then gently rolling it into a cylinder.

Shaping your baguette is an art that takes a bit of practice, but with patience and gentle handling, you’ll soon be creating beautiful, crusty loaves that will make your friends and family swoon. As you shape your dough, you’ll want to apply gentle pressure, using your palms to elongate the loaf and create a smooth, even surface.

Baking to Perfection

To achieve the perfect loaf, you’ll want to focus on the baking process. This is where your hard work pays off, and your dough transforms into a delicious, freshly baked bread.

Oven Temperature and Timing

Around the time you’re ready to bake, check your oven temperature and timing. The following table will guide you:

Temperature Timing
375°F 25-35 minutes

This will help you achieve the perfect bake.

Achieving the Perfect Crust

Timing is everything when it comes to baking your bread to get the perfect crust. You want to bake it until it’s golden brown and sounds hollow when tapped.

Further, to enhance the crust, you can try baking your bread with steam, which will give it a crispy, golden exterior and a soft interior. As you experiment with different techniques, you’ll find what works best for you and your bread-baking style, and soon you’ll be enjoying a delicious, homemade loaf with a perfect crust.

Troubleshooting Common Issues

Once again, you’ll find that practice makes perfect when it comes to homemade bread. As you experiment with different recipes and techniques, you’ll encounter some common issues that can be easily resolved with a few tweaks.

Dealing with Sticky Dough

Common issues with sticky dough can be frustrating, but you can try adding a small amount of flour to balance the consistency, and then knead the dough until it becomes smooth and elastic.

Resolving Oven Temperature Problems

Common problems with oven temperature can affect your bread’s texture and flavor. You can use the following table to troubleshoot:

Oven Temperature Issues

Cause Solution
Oven temperature inaccurate Invest in an oven thermometer
Oven temperature too high Reduce oven temperature by 25°F

Problems with oven temperature can be easily resolved by following the solutions outlined in the table above. You’ll find that investing in an oven thermometer will help you achieve consistent results, and adjusting the oven temperature will ensure your bread is cooked to perfection. With a little patience and practice, you’ll be able to identify and solve these common issues, and your homemade bread will turn out delicious every time.

Creative Variations

For the adventurous baker, there are countless ways to experiment with homemade bread. You can explore new flavors and techniques with the help of resources like Homemade Bread – Comprehensive Guide, Bake Ancient Grains and Artisan Breads.

Adding Herbs and Spices

Along with your favorite ingredients, you can add fresh or dried herbs and spices to create unique flavor profiles. Try combining rosemary and olive oil or parsley and garlic for a delicious twist.

Trying New Types of Flour

Trying new types of flour can greatly impact your bread’s texture and flavor. You can:

  • Experiment with whole wheat, rye, or oat flour
  • Try ancient grains like quinoa or Kamut

Perceiving the differences in your bread, you’ll be inspired to continue experimenting.

Flour Type Characteristics
Whole Wheat Nutty flavor, denser texture
Rye Earthier flavor, darker color
Oat Slightly sweet, softer texture
Ancient Grains Nutty flavor, higher protein content

Considering your options, you can try new types of flour to create unique breads. You can:

  • Experiment with different ratios of flour types
  • Try adding nuts, seeds, or dried fruits

Perceiving the possibilities, you’ll be excited to try new recipes and flavor combinations.

Summing up

Ultimately, you now hold the secrets to creating delicious homemade bread, and with practice, your skills will flourish. You’ll find that the joy of bread-making is not only in the end result, but in the process itself. As you continue to experiment and perfect your craft, your bread will become a reflection of your love and care, and you’ll be delighted to share it with family and friends, spreading warmth and happiness with every freshly baked loaf.

How to Make the Best Homemade Burgers

Get ready to elevate your grilling game, as you launch on a journey to create the most mouthwatering homemade burgers. You’re about to unlock the secrets to crafting perfectly juicy patties, with just the right balance of flavors and textures. With your own two hands, you’ll shape, season, and sizzle your way to burger greatness, impressing your family and friends with your culinary skills. Your kitchen is about to become a burger lover’s paradise, and it all starts with a few simple steps that you’ll master in no time.

Selecting the Finest Ingredients

While preparing to make the best homemade burgers, you’ll want to start by gathering the finest ingredients, as this will directly impact the flavor and quality of your final product. You’ll be using these ingredients to create a culinary masterpiece, so choose them wisely.

Choosing the Right Meat

Meat selection is the foundation of a great burger, and you should opt for a type that suits your taste preferences, such as beef, turkey, or vegetarian options, considering factors like fat content and origin to ensure your burgers are juicy and full of flavor.

Fresh Produce for Added Flavor

About the additional ingredients, you’ll be adding to your burger, selecting fresh produce like lettuce, tomatoes, and onions will elevate the flavor and texture, allowing you to create a truly exceptional burger that showcases your culinary skills.

Hence, when it comes to fresh produce, you should look for seasonal and locally sourced options, as they tend to have more flavor and a better texture, and don’t hesitate to get creative with your choices, experimenting with different combinations to find the perfect balance of flavors for your homemade burgers.

Preparing the Perfect Patty

Even the most seasoned chefs will agree that a well-crafted patty is crucial to a great burger. You’ll want to handle the meat with care and attention to detail to achieve the perfect texture and flavor.

Handling the Meat with Care

Only by being gentle when handling the meat can you avoid compacting it too much, which can lead to a dense patty. You should handle the meat just enough to form it into a ball and then flatten it slightly into a patty shape.

Tips for Even Thickness

Achieving an even thickness is vital for consistent cooking, and you can do this by using a few simple techniques. You can try:

  • using a patty maker
  • pressing the meat gently with your thumb
  • using a scale to measure the meat

. Any mistake in the thickness can affect the overall cooking time and taste of your burger.

Another key aspect of achieving even thickness is making sure you don’t overwork the meat. You can try:

  • handling the meat lightly
  • using a gentle pressing motion
  • checking the thickness regularly

. Any variation in thickness can be adjusted by gently pressing the meat to even it out, and with practice, you’ll develop the skill to craft perfectly even patties every time.

Seasoning and Marinades

Your burgers’ flavor profiles rely heavily on the seasoning and marinades you choose, so take your time to select the perfect blend to elevate your patties.

Classic Seasoning Blends

Across various cuisines, traditional seasoning blends like salt, pepper, and herbs offer a timeless flavor that complements your juicy burgers beautifully, allowing you to create a mouthwatering dish.

Experimental Marinade Recipes

Against the backdrop of classic flavors, you can try bold marinades, such as teriyaki or chipotle, to add an exciting twist to your homemade burgers, giving you options to suit your taste.

At this stage, you can get creative with your marinade recipes, combining flavors like soy sauce, garlic, and lemon juice to create a unique taste experience that will leave you and your dinner guests wanting more, as you experiment with different ingredients to find your perfect match.

Cooking Techniques

All the cooking methods you’ll use to make your burgers will impact the final result, so it’s imperative to choose the right one for your taste preferences. You can achieve a delicious burger using various techniques, and it’s up to you to decide which one suits you best.

Grilling to Perfection

Pan-Searing for a Crispy Crust

Beside grilling, pan-searing is another excellent method to achieve a crispy crust on your burgers, and you can do it in the comfort of your own kitchen. You’ll need a hot pan with some oil to get that perfect crust on your burger.

Plus, when you’re pan-searing, you can add aromatics like onions and garlic to the pan for added flavor, and you can also use different types of oil, such as olive or avocado oil, to give your burgers a unique taste. As you cook your burgers, you’ll notice the crust forming, and you can adjust the heat to your liking to achieve the perfect doneness.

Assembling the Burger

Once again, you’re just a step away from creating a masterpiece, and for inspiration, you can check out this Perfect Hamburger Recipe (VIDEO) to get some tips. Now, it’s time to bring all the components together to create your perfect burger.

The Art of Topping Selection

To elevate your burger, you need to select the right toppings, considering the flavor profile you want to achieve, and making sure they complement your patty and bun.

Building the Perfect Stack

About to assemble your burger, you should start with the bottom bun, followed by the patty, and then add your chosen toppings.

The key to building the perfect stack is balance and harmony, so as you add each component, make sure your burger stays stable and appealing, and don’t hesitate to get creative with your toppings, as this is where you can truly make your burger unique and tailored to your taste preferences, allowing you to enjoy the fruits of your labor.

Tips and Tricks

For perfect homemade burgers, consider these tips:

  • Handle the meat gently
  • Don’t overwork the meat
  • The key to a great burger is in the details, so pay attention to your technique.

    Common Mistakes to Avoid

    Fortunately, avoiding mistakes is easy when you know what to look out for, such as overcooking or underseasoning, to ensure your burgers turn out delicious.

    Innovative Twists for the Adventurous

    Behind the classic burger recipe, there are many creative variations you can try, such as unique toppings or sauces, to give your burgers a personal touch.

    It is exciting to experiment with different ingredients and flavors to create your own signature burger style, and you can draw inspiration from various cuisines, such as Korean BBQ or Greek, to add a twist to your homemade burgers, making them truly special and reflections of your personality and taste preferences.

    Summing up

    Considering all points, you now have the skills to create your perfect homemade burgers. With your freshly ground meat, carefully selected toppings, and gentle handling, you’re ready to craft a culinary masterpiece. As you assemble your burger, think about the flavors and textures you’ve combined, and take pride in your creation, knowing you’ve made something truly special with your own hands, and you can’t wait to take a bite of your delicious homemade burger.

How to Make Homemade Ice Cream Without a Machine

As you initiate on this delightful adventure, you’ll discover that making homemade ice cream without a machine is entirely within your reach. You’ll be thrilled to find that with just a few simple ingredients and some basic equipment, you can create your own creamy, dreamy ice cream flavors. Your taste buds will thank you as you take the first step towards becoming your own ice cream artisan, and with this guide, you’ll be scooping up your favorite flavors in no time, all from the comfort of your own kitchen.

Gathering Essential Ingredients

A trip to the store is in order to gather the crucials for your homemade ice cream adventure, and if you’re looking for inspiration, check out Two Ingredient Ice Cream – No Machine Required! for a simplified approach.

Choosing the Right Cream and Sugar

On your journey to create the perfect ice cream, you’ll want to select a rich, high-quality cream and a sugar that suits your taste, as these will be the foundation of your delicious treat, and you can trust that your choices will make all the difference.

Selecting Flavorings and Mix-ins

At this stage, you get to have some fun and add your personal touch to your ice cream, choosing from a variety of flavorings and mix-ins that will make your creation truly special and reflective of your unique taste.

But what’s even more exciting is that you can experiment with different combinations to create unique and intriguing flavors, such as matching ripe strawberries with balsamic vinegar or combining rich cocoa with crunchy nuts, and as you explore these possibilities, you’ll find that your ice cream becomes a true reflection of your personality and creativity, allowing you to share a part of yourself with others through the joy of a cool, sweet treat on a warm day.

Preparing the Base

Some of the most decadent homemade ice creams start with a rich and creamy base, and you’ll be delighted to know that making one is quite straightforward. You’ll need to combine your ingredients, such as cream, sugar, and flavorings, in a way that creates a smooth and velvety texture.

Whisking and Heating the Mixture

One of the first steps in preparing your base is to whisk together your ingredients until they’re well combined, then heat the mixture gently to dissolve the sugar and infuse the flavors. You’ll want to stir constantly to prevent scorching, and as you do, you’ll start to notice the mixture thickening and emulsifying.

Cooling and Chilling the Base

Chilling your base is an crucial step, as it allows the flavors to meld together and the mixture to firm up. You’ll want to let it cool to room temperature, then cover it and refrigerate it for at least two hours or overnight.

Cooling your base is just the beginning – as it chills, you’ll start to notice the flavors deepening and the texture becoming more refined. You can help the process along by stirring the base occasionally as it chills, and when you’re ready to proceed, you’ll be amazed at how smooth and creamy it’s become, just perfect for churning into your very own homemade ice cream, and you’ll be thrilled to see your efforts come to life in a deliciously creamy treat.

Churning the Ice Cream

After preparing your mixture, it’s time to churn your ice cream. This process introduces air and breaks down ice crystals, giving your ice cream a smooth texture. You’ll need to choose a method to churn your ice cream, and don’t worry, it’s easier than you think.

Using a Blender or Food Processor

About every 30 minutes, you’ll blend your mixture to break down the ice crystals and introduce air. This process will take some time, but the result will be worth it. You’ll be thrilled with the creamy texture you can achieve with just a blender or food processor.

Hand-Churning with a Whisk or Fork

Understanding the importance of temperature and consistency is key when hand-churning with a whisk or fork. You’ll want to make sure your mixture is cold, but not too cold, and that you’re whisking or forking consistently to introduce air and break down ice crystals. As you continue to churn, you’ll notice your ice cream start to take shape, and with a bit of practice, you’ll be making delicious homemade ice cream like a pro.

Adding Flavor and Texture

Your homemade ice cream is now ready for the fun part – adding flavor and texture! You can mix in your favorite ingredients, such as cocoa powder, nuts, or fruit, to create unique and delicious flavors.

Introducing Mix-ins and Toppings

Topplings like sprinkles, whipped cream, or chocolate chips can add a pop of color and flavor to your ice cream. You can also try mixing in some caramel sauce or honey for a sweet and sticky surprise.

Creating Unique and Delicious Combinations

Among the many possibilities, you can combine your favorite fruits, nuts, and spices to create one-of-a-kind flavors. You can try pairing strawberries with balsamic glaze or mixing in some cinnamon with caramel sauce.

In addition, you can experiment with different types of milk, such as almond or coconut milk, to create creamy and dairy-free ice cream. As you play around with various combinations, you’ll discover your own signature flavors and become more confident in your ice cream-making skills, and before you know it, you’ll be creating unique and delicious ice cream flavors like a pro!

Freezing and Hardening

Not every ice cream maker has the luxury of an automatic freezer, but that’s perfectly all right. You can still achieve a deliciously smooth texture by following a few simple steps.

The Importance of Temperature and Time

By taking a closer look at the freezing process, you’ll understand how it affects your ice cream’s texture.

Temperature Time
0°F to 5°F 2 to 3 hours

You’ll be amazed at how these factors impact your final product.

Tips for Achieving the Perfect Consistency

To achieve the perfect consistency, you should consider a few factors. Here are some tips to get you started:

  • Stir your mixture every 30 minutes
  • Check the texture regularly

Assume that with a little practice, you’ll be making perfect ice cream in no time.

Consistency is key when making homemade ice cream, and you have the power to control it. Here are a few more tips to help you get started:

  • Use a mixture of cream and sugar for a smoother texture
  • Don’t over-churn your mixture

Assume that with patience and practice, you’ll soon be enjoying your very own delicious homemade ice cream.

Troubleshooting Common Issues

All homemade ice cream makers encounter problems, but don’t worry, you can easily fix them. With a few tips, you’ll be enjoying your creamy treat in no time.

Dealing with Ice Crystals and Grainy Texture

For instance, to avoid ice crystals, make sure your mixture is chilled before freezing, and use a blender to break down ice crystals that form during freezing, yielding a smooth texture you’ll adore.

Resolving Flavor and Consistency Problems

Before you serve, taste your ice cream and adjust the flavor as needed, adding more sweetener or mix-ins to get your desired taste, and don’t be afraid to experiment with different combinations to find your perfect flavor.

Consequently, as you practice making homemade ice cream, you’ll develop a sense of how to balance flavors and achieve the consistency you like, and soon you’ll be creating unique and delicious flavors that will impress your friends and family, and you’ll be thrilled with the outcome of your efforts.

Conclusion

Ultimately, you now have the tools to create your own homemade ice cream without a machine, and the possibilities are endless. You can experiment with your favorite flavors and ingredients to craft a unique treat that’s all your own. With a little patience and practice, you’ll be churning out delicious ice cream like a pro, and your family and friends will adore your creamy creations. Enjoy the sweet satisfaction of making something truly special, just for you and your loved ones to savor.

How to Make Your Own Pickles at Home

You can easily create delicious pickles in the comfort of your own kitchen. With a few simple ingredients and some basic equipment, you’ll be on your way to making your own pickles. Your homemade pickles will have a unique flavor and texture that you can customize to your taste. You’ll learn how to select the right cucumbers, create a flavorful brine, and properly can your pickles to enjoy them all year round.

Gathering Ingredients

The process of making your own pickles at home begins with gathering the necessary ingredients. You will need a variety of items, including cucumbers, vinegar, sugar, salt, and spices. Your pantry may already have some of these items, but you will likely need to make a trip to the store to pick up a few more.

Essential Pickling Spices

One of the most important aspects of pickling is the blend of spices you use. You will want to have a combination of spices such as dill, garlic, and mustard seeds to give your pickles a traditional flavor. You can adjust the amount and type of spices to suit your personal taste preferences.

Choosing the Right Cucumbers

Across the country, you can find a wide variety of cucumbers to use for pickling. You will want to choose cucumbers that are fresh and have a consistent texture. Look for cucumbers that are specifically labeled as “pickling cucumbers” for the best results.

Consequently, as you select your cucumbers, consider the size and shape you want your pickles to be. You can use small cucumbers to make bite-sized pickles or larger ones to make sandwich slices. You should also inspect the cucumbers for any signs of damage or spoiling, as this can affect the quality of your final product. By choosing the right cucumbers, you will be able to create delicious pickles that you will enjoy eating.

Equipment and Supplies

Clearly, making pickles at home requires some basic equipment and supplies. You will need to gather a few important items to get started with the pickling process.

Jars and Lids

Across the board, you’ll find that jars and lids are must-haves for storing your homemade pickles. You can use glass jars with tight-fitting lids to keep your pickles fresh.

Utensils and Tools

The right utensils and tools will make the pickling process easier and more efficient for you. You’ll need items like a large pot, a strainer, and a cutting board to prepare your ingredients.

At this stage, you may be wondering what other utensils and tools you need to make pickles. You will also need a knife, a garlic press, and a spoon to handle the pickling liquid and spices. As you gather your utensils and tools, you’ll be ready to start making your own pickles at home, and with practice, you’ll become more comfortable with the process, allowing you to experiment with different recipes and ingredients to create your unique pickle flavors.

Preparing the Pickling Liquid

Your pickling liquid is the foundation of your homemade pickles, and it’s necessary to get it right. You’ll need to combine water, salt, and vinegar to create a brine that will give your pickles their distinctive flavor and texture.

Vinegar and Acidity

One of the key components of the pickling liquid is vinegar, which provides the acidity that helps to preserve the pickles and gives them their tangy flavor. You can use white vinegar, apple cider vinegar, or white wine vinegar, depending on your personal preference.

Sugar and Seasoning

On top of the basic brine, you can add sugar and various seasonings to give your pickles extra flavor. You can try adding garlic, dill, or mustard seeds to create a unique taste.

Considering the type of pickles you want to make, you can adjust the amount of sugar and seasoning to your taste. You may prefer a sweeter pickle or a more savory one, so don’t be afraid to experiment with different combinations to find the perfect flavor for your homemade pickles.

The Pickling Process

All you need to know about making pickles is available online, and if you’re wondering how hard is it to make your own pickles?, you can find many helpful resources.

Slicing and Soaking

Packing and Sealing

An important step in the pickling process is packing your pickles into jars and sealing them properly to ensure they are airtight and ready for storage.

Slicing your pickles evenly and packing them tightly into the jar is vital for the packing and sealing step, as you want to make sure your pickles are fully submerged in the brine solution and that the jar is sealed properly to prevent spoilage, allowing you to enjoy your homemade pickles for a longer period.

Troubleshooting Common Issues

Unlike other preservation methods, making pickles at home can be quite forgiving, but you may still encounter some issues that need to be addressed to ensure your pickles turn out delicious and safe to eat.

Dealing with Mold and Spoilage

Besides maintaining proper hygiene and storage, you should also check your pickles regularly for signs of mold or spoilage, and discard any affected jars to prevent contamination.

Adjusting Flavor and Texture

By experimenting with different seasoning blends and soaking times, you can adjust the flavor and texture of your pickles to your liking, whether you prefer them sweet and tangy or sour and crunchy.

To achieve the perfect balance of flavor and texture, you will need to taste your pickles regularly and make adjustments as needed, considering factors such as the type of cucumbers you use, the level of acidity, and the presence of additional ingredients like garlic or dill, which can all impact the final product and help you refine your recipe to suit your taste preferences.

Storage and Serving

Once again, you’ll want to consider how you plan to store and serve your homemade pickles to ensure they stay fresh and delicious. Proper storage and serving techniques can make a big difference in the quality and flavor of your pickles.

Refrigeration and Shelf Life

Storing your pickles in the refrigerator will help maintain their flavor and texture, allowing you to enjoy them for several weeks. You can store them in airtight containers or jars, keeping them fresh for a longer period.

Serving Suggestions and Recipes

Aside from snacking on them directly, you can use your homemade pickles in a variety of dishes, such as sandwiches, salads, and sauces, adding a burst of flavor to your meals.

But as you experiment with different serving suggestions and recipes, you’ll find that your homemade pickles can elevate even the simplest meals, and you can get creative with using them as a topping or mixing them into your favorite dips and spreads, the possibilities are endless, and you can enjoy your pickles in many different ways.

Summing up

The process of making pickles at home is straightforward, and you can achieve great results by following simple steps. You have learned how to prepare your ingredients, create a brine, and allow your pickles to ferment. With your newfound knowledge, you can now experiment with different flavors and ingredients to create your unique pickling recipes, enjoying your homemade pickles in no time, and sharing them with your loved ones, taking pride in your culinary skills.

Same O Skip to content