The Top Food Trends for This Year

As you plan your culinary adventures, you’re likely wondering what’s hot and what’s not in the world of food. Your taste buds are in luck, because this year’s top food trends are all about exciting flavors and innovative ingredients. You can expect to see a surge in plant-based eating, sustainable foods, and unique fusions of international cuisines. Get ready to elevate your dining experiences and stay ahead of the curve with the latest must-try foods and drinks that will take your palate on a thrilling ride.

Global Cuisine Trends

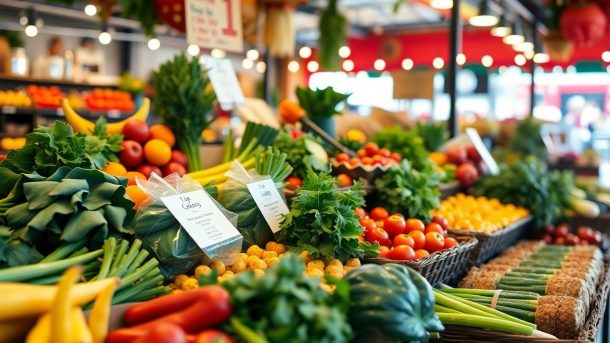
Before submerging into the latest food trends, you’ll notice a significant shift towards global cuisine. Your taste buds will take a journey around the world, exploring new flavors and dishes.

International Flavors

Above all, you’ll find that international flavors are becoming increasingly popular, with your local restaurants and grocery stores offering a wide range of global ingredients and dishes.

Fusion Foods

For instance, you’ll see a rise in fusion foods, where different culinary traditions come together to create something unique and exciting, allowing you to experience new flavors and textures.

Indeed, fusion foods offer you a chance to explore innovative combinations, such as Korean tacos or sushi quesadillas, and you can expect to see more of these creative blends on menus and in your own kitchen.

Sustainable Eating

There’s a growing demand for sustainable eating, and you’re likely to see more eco-friendly options on menus and in stores. You’ll have the opportunity to make a positive impact on the environment with your food choices.

Plant-Based Options

Beneath the surface of sustainable eating, you’ll find plant-based options are becoming increasingly popular. You can expect to see more plant-based dishes and products, allowing you to reduce your carbon footprint.

Eco-Friendly Packaging

Packaging is being reimagined with sustainability in mind, and you’ll notice a shift towards biodegradable and compostable materials. You can look forward to reducing your waste with these innovative packaging solutions.

To make the most of eco-friendly packaging, you can start by choosing products with minimal or biodegradable packaging, and properly disposing of them. You can also influence the industry by supporting companies that prioritize sustainability, and encouraging your favorite brands to adopt eco-friendly practices.

Comfort Food Revival

Despite the rise of healthy eating, you’re likely to find comfort food making a comeback this year. You can expect to see classic dishes with a twist, homestyle cooking, and nostalgic flavors that bring you back to your childhood.

Classic Dishes Reimagined

Dishes like mac and cheese, burgers, and fries will be reimagined with creative ingredients and presentation, allowing you to experience your favorite comfort foods in a new way.

Hearty, Homestyle Cooking

An array of homestyle cooking methods, such as slow-cooking and braising, will become increasingly popular, helping you to create hearty, satisfying meals that warm your belly and your heart.

Indeed, as you explore the world of hearty, homestyle cooking, you’ll discover that it’s not just about the food itself, but about the experience of cooking and sharing meals with loved ones, creating a sense of comfort and community that you’ll cherish.

Emerging Ingredients

After exploring the latest culinary innovations, you’ll notice a shift towards unique and sustainable ingredients. Your cooking will become more exciting with the incorporation of new flavors and textures, elevating your dishes to the next level.

Exotic Spices and Herbs

Prior to this year, you might have been familiar with common spices, but now you can experiment with exotic options like berbere and shichimi togarashi, adding depth to your recipes.

Alternative Proteins

The rise of plant-based diets has led you to consider alternative protein sources, such as tofu, tempeh, and seitan, which offer versatile and nutritious options for your meals.

Due to the growing demand for sustainable and environmentally-friendly food choices, you’ll find that alternative proteins are becoming increasingly popular, allowing you to create delicious and innovative dishes that cater to various dietary preferences and needs, making your cooking more inclusive and exciting for your guests.

Food Technology Innovations

Keep yourself updated with the latest developments in food technology, as you explore the future of food. You can check out 10 Important Food Trends for 2024 and 2025 to stay informed.

Meal Kits and Delivery Services

Meanwhile, meal kit services are becoming increasingly popular, allowing you to prepare healthy meals at home with ease, and you can expect to see more innovative options in this area.

Smart Kitchen Appliances

Among the many advancements in food technology, smart kitchen appliances are making cooking more efficient and enjoyable for you, with features like automated meal prep and personalized recipes.

Hence, as you consider incorporating smart kitchen appliances into your daily routine, you’ll find that they can help you streamline your cooking process, saving you time and effort, and enabling you to focus on exploring new recipes and flavors, making the cooking experience more enjoyable for you.

Dining Experiences

Your dining experiences are evolving, with a focus on unique and engaging encounters. You can expect restaurants to offer more than just a meal, with immersive experiences and social media-worthy moments.

Social Media Influenced Restaurants

Behind the rise of Instagrammable eateries, you’ll find a desire for shareable moments. You’re looking for restaurants that offer visually stunning dishes and settings, making your dining experience a social media sensation.

Immersive Food Events

Food festivals and interactive culinary events are on the rise, offering you an immersive experience. You’ll engage with chefs, learn about ingredients, and savor new flavors in a unique setting.

In addition to the interactive nature of these events, you’ll also have the opportunity to explore different cuisines and cooking techniques. You’ll be able to taste dishes prepared by renowned chefs, and learn about the story behind each recipe, making your dining experience even more enjoyable and memorable.

To wrap up

Taking this into account, you now have a comprehensive overview of the top food trends for this year. You can incorporate these trends into your diet, exploring new flavors and ingredients to elevate your culinary experience. Your taste buds will thank you as you explore into the world of innovative and delicious food options, making your dining experiences even more enjoyable and satisfying.

How to Make Homemade Ice Cream Without a Machine

As you initiate on this delightful adventure, you’ll discover that making homemade ice cream without a machine is entirely within your reach. You’ll be thrilled to find that with just a few simple ingredients and some basic equipment, you can create your own creamy, dreamy ice cream flavors. Your taste buds will thank you as you take the first step towards becoming your own ice cream artisan, and with this guide, you’ll be scooping up your favorite flavors in no time, all from the comfort of your own kitchen.

Gathering Essential Ingredients

A trip to the store is in order to gather the crucials for your homemade ice cream adventure, and if you’re looking for inspiration, check out Two Ingredient Ice Cream – No Machine Required! for a simplified approach.

Choosing the Right Cream and Sugar

On your journey to create the perfect ice cream, you’ll want to select a rich, high-quality cream and a sugar that suits your taste, as these will be the foundation of your delicious treat, and you can trust that your choices will make all the difference.

Selecting Flavorings and Mix-ins

At this stage, you get to have some fun and add your personal touch to your ice cream, choosing from a variety of flavorings and mix-ins that will make your creation truly special and reflective of your unique taste.

But what’s even more exciting is that you can experiment with different combinations to create unique and intriguing flavors, such as matching ripe strawberries with balsamic vinegar or combining rich cocoa with crunchy nuts, and as you explore these possibilities, you’ll find that your ice cream becomes a true reflection of your personality and creativity, allowing you to share a part of yourself with others through the joy of a cool, sweet treat on a warm day.

Preparing the Base

Some of the most decadent homemade ice creams start with a rich and creamy base, and you’ll be delighted to know that making one is quite straightforward. You’ll need to combine your ingredients, such as cream, sugar, and flavorings, in a way that creates a smooth and velvety texture.

Whisking and Heating the Mixture

One of the first steps in preparing your base is to whisk together your ingredients until they’re well combined, then heat the mixture gently to dissolve the sugar and infuse the flavors. You’ll want to stir constantly to prevent scorching, and as you do, you’ll start to notice the mixture thickening and emulsifying.

Cooling and Chilling the Base

Chilling your base is an crucial step, as it allows the flavors to meld together and the mixture to firm up. You’ll want to let it cool to room temperature, then cover it and refrigerate it for at least two hours or overnight.

Cooling your base is just the beginning – as it chills, you’ll start to notice the flavors deepening and the texture becoming more refined. You can help the process along by stirring the base occasionally as it chills, and when you’re ready to proceed, you’ll be amazed at how smooth and creamy it’s become, just perfect for churning into your very own homemade ice cream, and you’ll be thrilled to see your efforts come to life in a deliciously creamy treat.

Churning the Ice Cream

After preparing your mixture, it’s time to churn your ice cream. This process introduces air and breaks down ice crystals, giving your ice cream a smooth texture. You’ll need to choose a method to churn your ice cream, and don’t worry, it’s easier than you think.

Using a Blender or Food Processor

About every 30 minutes, you’ll blend your mixture to break down the ice crystals and introduce air. This process will take some time, but the result will be worth it. You’ll be thrilled with the creamy texture you can achieve with just a blender or food processor.

Hand-Churning with a Whisk or Fork

Understanding the importance of temperature and consistency is key when hand-churning with a whisk or fork. You’ll want to make sure your mixture is cold, but not too cold, and that you’re whisking or forking consistently to introduce air and break down ice crystals. As you continue to churn, you’ll notice your ice cream start to take shape, and with a bit of practice, you’ll be making delicious homemade ice cream like a pro.

Adding Flavor and Texture

Your homemade ice cream is now ready for the fun part – adding flavor and texture! You can mix in your favorite ingredients, such as cocoa powder, nuts, or fruit, to create unique and delicious flavors.

Introducing Mix-ins and Toppings

Topplings like sprinkles, whipped cream, or chocolate chips can add a pop of color and flavor to your ice cream. You can also try mixing in some caramel sauce or honey for a sweet and sticky surprise.

Creating Unique and Delicious Combinations

Among the many possibilities, you can combine your favorite fruits, nuts, and spices to create one-of-a-kind flavors. You can try pairing strawberries with balsamic glaze or mixing in some cinnamon with caramel sauce.

In addition, you can experiment with different types of milk, such as almond or coconut milk, to create creamy and dairy-free ice cream. As you play around with various combinations, you’ll discover your own signature flavors and become more confident in your ice cream-making skills, and before you know it, you’ll be creating unique and delicious ice cream flavors like a pro!

Freezing and Hardening

Not every ice cream maker has the luxury of an automatic freezer, but that’s perfectly all right. You can still achieve a deliciously smooth texture by following a few simple steps.

The Importance of Temperature and Time

By taking a closer look at the freezing process, you’ll understand how it affects your ice cream’s texture.

Temperature Time
0°F to 5°F 2 to 3 hours

You’ll be amazed at how these factors impact your final product.

Tips for Achieving the Perfect Consistency

To achieve the perfect consistency, you should consider a few factors. Here are some tips to get you started:

  • Stir your mixture every 30 minutes
  • Check the texture regularly

Assume that with a little practice, you’ll be making perfect ice cream in no time.

Consistency is key when making homemade ice cream, and you have the power to control it. Here are a few more tips to help you get started:

  • Use a mixture of cream and sugar for a smoother texture
  • Don’t over-churn your mixture

Assume that with patience and practice, you’ll soon be enjoying your very own delicious homemade ice cream.

Troubleshooting Common Issues

All homemade ice cream makers encounter problems, but don’t worry, you can easily fix them. With a few tips, you’ll be enjoying your creamy treat in no time.

Dealing with Ice Crystals and Grainy Texture

For instance, to avoid ice crystals, make sure your mixture is chilled before freezing, and use a blender to break down ice crystals that form during freezing, yielding a smooth texture you’ll adore.

Resolving Flavor and Consistency Problems

Before you serve, taste your ice cream and adjust the flavor as needed, adding more sweetener or mix-ins to get your desired taste, and don’t be afraid to experiment with different combinations to find your perfect flavor.

Consequently, as you practice making homemade ice cream, you’ll develop a sense of how to balance flavors and achieve the consistency you like, and soon you’ll be creating unique and delicious flavors that will impress your friends and family, and you’ll be thrilled with the outcome of your efforts.

Conclusion

Ultimately, you now have the tools to create your own homemade ice cream without a machine, and the possibilities are endless. You can experiment with your favorite flavors and ingredients to craft a unique treat that’s all your own. With a little patience and practice, you’ll be churning out delicious ice cream like a pro, and your family and friends will adore your creamy creations. Enjoy the sweet satisfaction of making something truly special, just for you and your loved ones to savor.

How to Cook a Holiday Turkey Without Stress

As you launch on cooking your holiday turkey, you’re likely feeling a mix of excitement and nerves. Fear not, dear cook! With a few simple tips and tricks, you’ll be on your way to a stunning, stress-free holiday meal. Your guests will be impressed, and you’ll be thrilled with the outcome. To get started, take a look at this helpful guide on How to cook perfect roast turkey – the stress-free way! and discover the secrets to a deliciously cooked turkey.

Preparing for the Big Day

Your holiday turkey dinner will be a success with some advance planning, and by following a few simple steps, you’ll be on your way to a stress-free celebration.

Planning the Menu

Along with the turkey, consider the other dishes you want to serve, and think about your family’s favorite sides and desserts, so you can create a well-rounded and delicious meal that everyone will enjoy.

Making a Shopping List

Alongside your menu plan, start making a list of the ingredients and supplies you’ll need, so you can make sure you have everything on hand when it’s time to start cooking.

For instance, you’ll want to make sure you have a roasting pan that’s large enough to hold your turkey, as well as all the necessary spices and seasonings to bring out the best flavors in your meal, and by checking your list twice, you can avoid last-minute trips to the store and stay focused on cooking a wonderful holiday dinner.

Thawing and Preparing the Turkey

Any holiday meal isn’t complete without a deliciously cooked turkey, and it all starts with proper thawing and preparation. You’ll want to ensure your turkey is thawed and ready for roasting to achieve the perfect flavor and texture.

Safe Thawing Methods

Fortunately, there are several safe ways to thaw your turkey, including thawing it in the refrigerator, in cold water, or in the microwave. You should choose the method that works best for your schedule and the size of your turkey.

Preparing the Turkey for Roasting

Before you start roasting, you’ll need to prepare your turkey by removing the giblets and neck, rinsing it inside and out, and patting it dry with paper towels. You should also season your turkey with your favorite herbs and spices to add extra flavor.

Also, take a moment to consider the type of roast you want to achieve, and adjust your preparation accordingly. You can stuff your turkey with aromatic vegetables like onions and carrots, or rub it with a mixture of butter and herbs for a golden-brown finish. As you prepare your turkey, you’ll be one step closer to a truly unforgettable holiday meal that your family and friends will cherish.

Cooking the Turkey

Once again, you’ll find that cooking a turkey is quite straightforward. Simply preheat your oven to the desired temperature and place the turkey inside, breast side up. Let it cook until it reaches the perfect golden brown color.

Roasting Techniques

Between the options of roasting and grilling, roasting is the way to go for a stress-free holiday turkey. You’ll achieve a deliciously moist and flavorful bird with minimal effort.

Monitoring the Temperature

Around this time, you’ll want to keep an eye on your turkey’s temperature.

Temperature Time
325°F 4-4 1/2 hours
350°F 3-3 1/2 hours

But as you’re checking the temperature, you’ll also want to consider the size of your turkey.

Turkey Size Cooking Time
12-14 pounds 3-3 1/2 hours
14-18 pounds 3 1/2-4 1/2 hours

You’ll find that your patience will be rewarded with a perfectly cooked turkey, and you’ll be the star of your holiday gathering.

Gravy and Side Dishes

After the turkey is cooked, it’s time to focus on the accompaniments that will elevate your holiday meal. You’ll want to create a rich, savory gravy and prepare some delicious side dishes to complement your perfectly roasted turkey.

Making the Perfect Gravy

Once you’ve mastered the art of roasting a turkey, you can turn your attention to crafting a delicious gravy to serve alongside it. You’ll find that making gravy is quite straightforward, and with a few simple ingredients, you can create a rich, flavorful sauce to enhance your meal.

Delicious Side Dish Recipes

Around the holidays, you’ll want to serve side dishes that are both traditional and tasty. You can choose from a variety of options, such as mashed potatoes, green beans, or sweet potatoes, to create a well-rounded and satisfying meal.

In fact, your side dishes can be prepared ahead of time, allowing you to focus on the turkey and gravy on the big day. You can make your favorite recipes or try something new, like roasted Brussels sprouts or creamy spinach, to add some excitement to your holiday table. As you experiment with different side dishes, you’ll find that the key to success lies in using fresh, high-quality ingredients and cooking with love, just as you would when preparing your turkey.

Timing is Everything

Keep your holiday dinner on track by planning ahead. You’ll want to ensure your turkey is cooked to perfection, and that your side dishes are ready at the same time.

Creating a Cooking Schedule

Any experienced cook knows that a schedule is key to a stress-free holiday dinner. You will want to make a timeline of your cooking tasks, from prep work to serving.

Staying on Track

Along with your schedule, you’ll need to stay focused on the tasks at hand. You can do this by breaking down your cooking tasks into smaller, manageable chunks.

At this point, you’ve got your schedule and you’re staying on track, but it’s also important to be flexible. You may need to adjust your timing based on the size of your turkey or the number of side dishes you’re preparing. Don’t worry, with a little practice, you’ll be a pro at cooking a delicious holiday turkey in no time, and your guests will appreciate the effort you put into creating a wonderful meal for them to enjoy.

Presentation and Serving

Despite the hustle and bustle of the holiday season, presenting a beautifully cooked turkey can be a breeze. You’ll want to make a great impression on your guests, and with a few simple touches, your turkey will be the centerpiece of the table.

Beautiful Presentation Ideas

One of the easiest ways to add some flair to your turkey is to garnish it with fresh herbs, such as thyme or rosemary, and arrange it on a platter with some decorative fruits and vegetables. You can also add some golden-brown potatoes and carrots around the turkey for a pop of color.

Serving with Style

Along with a beautifully presented turkey, you’ll want to serve it with style and elegance. You can use your best china and silverware to add a touch of sophistication to the table, and don’t forget to have plenty of gravy and sauces on hand to complement the meal.

To serve your turkey with style, consider setting up a carving station with a beautifully decorated carving board and a sharp knife. You can also have a few serving dishes ready to go, filled with your favorite side dishes, such as mashed potatoes, green beans, and stuffing. As you carve the turkey, you can invite your guests to gather around and help themselves to the various dishes, making the meal feel more interactive and enjoyable.

Final Words

With these considerations, you’ll be well on your way to cooking a delicious holiday turkey without stress. You’ve got your timeline, your tools, and your techniques – now it’s time to put them all together. As you bask in the warm glow of your perfectly cooked turkey, you’ll be proud of your efforts and delighted by the joy it brings to your loved ones, and that, my friend, is the greatest reward of all, making your holiday meal truly special and one to treasure.

How to Create Delicious One-Pot Meals

You can simplify your cooking routine with one-pot meals, which offer a convenient and efficient way to prepare healthy and flavorful dishes. Your culinary skills will be put to the test as you explore the world of one-pot cooking, where you can create a variety of meals using just one vessel. You will learn how to combine ingredients, balance flavors, and cook your way to a satisfying meal with ease, making the most of your time and ingredients.

Choosing the Right Ingredients

While creating a one-pot meal, you’ll want to select ingredients that complement each other. For inspiration, check out Easy One Pot Meals to get started. You can then choose ingredients based on your dietary preferences and the recipe you’re following.

Selecting Fresh Produce

Around the time you start planning your one-pot meal, consider the fresh produce that’s in season. You’ll want to pick the freshest ingredients to ensure your dish is full of flavor and nutrients.

Picking the Perfect Proteins

Above all, your protein choice will greatly impact the overall flavor and texture of your one-pot meal. You’ll want to choose a protein that pairs well with your other ingredients and cooking method.

Hence, when selecting your protein, think about the cooking time and method. If you’re short on time, opt for quicker-cooking proteins like chicken or shrimp, and if you have more time, consider heartier options like beef or lamb, which will become tender with longer cooking times, making your one-pot meal delicious and satisfying.

Essential Cooking Techniques

Clearly, mastering a few key techniques will elevate your one-pot meals. You’ll be able to cook a variety of dishes with confidence and ease.

Searing and Browning

Similarly, searing your ingredients will add depth and flavor to your meals. You can achieve a nice brown crust on your protein and vegetables by cooking them in a hot pan with some oil.

Simmering and Braising

Before proceeding with your recipe, understand that simmering and braising are low-heat cooking methods. You can use them to cook tougher cuts of meat and vegetables until they’re tender and flavorful.

To take your simmering and braising to the next level, you’ll want to monitor your heat and liquid levels carefully. You should also be patient, as these methods can take some time, but the end result will be well worth the wait, and your one-pot meal will be rich and satisfying.

One-Pot Meal Ideas

Not only are one-pot meals convenient, but they also offer a world of flavors and possibilities. You can experiment with various ingredients and recipes to create your perfect dish.

Hearty Stews and Soups

By exploring different ingredients and spices, you can create rich and satisfying stews and soups that will become your go-to meals. You’ll find that your favorite ingredients can be combined in numerous ways.

Quick and Easy Skillet Meals

Similarly, soups and skillet meals can be prepared with ease, using your favorite protein and vegetables. You can whip up a delicious meal in no time, perfect for busy days.

Even if you’re short on time, you can still create a mouth-watering skillet meal. You can sauté your ingredients, add some seasonings, and serve a nutritious meal that your family will love. You’ll appreciate the simplicity and flexibility of one-pot cooking, as you can customize your meals to suit your tastes and dietary needs.

Meal Planning and Preparation

All successful one-pot meals start with a solid plan, and as you begin to think about your meal, consider the ingredients and equipment you’ll need to make it happen.

Creating a Grocery List

By taking a few minutes to write down the ingredients you need, you’ll ensure that you have everything on hand to make your one-pot meal a success, and you can avoid last-minute trips to the store.

Prepping Ingredients in Advance

Prepping some ingredients ahead of time can save you time and stress when it’s time to cook, and you can chop vegetables, marinate proteins, and measure out spices to get a head start on your meal.

Creating a routine of prepping ingredients in advance will become second nature as you continue to make one-pot meals, and you’ll find that it helps you to stay organized and focused in the kitchen, allowing you to enjoy the process of cooking and sharing meals with your loved ones.

Cooking and Serving

Once again, you’ll find that one-pot meals are a breeze to cook and serve, as everything is prepared in a single vessel, making the process efficient and streamlined, allowing you to focus on presentation and enjoying your meal.

Bringing it all Together

Only by combining your ingredients and seasonings will you achieve a harmonious balance of flavors, and your one-pot meal will be a true delight, with you as the master chef behind its creation.

Presentation and Garnish

To add a finishing touch to your one-pot meal, consider adding some fresh herbs or a sprinkle of parmesan cheese, which will elevate your dish and make it visually appealing, showcasing your culinary skills to your guests.

At this stage, you can get creative with your presentation, using your one-pot meal as a canvas to express your personality and style, and YOU will be amazed at how a simple garnish can transform your dish into a stunning culinary masterpiece that you’ll be proud to serve and share with others.

Troubleshooting Common Issues

Many one-pot meal cooks encounter problems that can be easily resolved with a few simple tips. You can avoid common pitfalls and create delicious meals by being aware of potential issues and taking steps to prevent them.

Avoiding Overcooking

Around the time your meal is almost done, check it frequently to prevent overcooking. You can adjust the heat or cooking time to ensure your dish turns out perfectly.

Fixing Flavor Imbalances

Flavoring your one-pot meal is an art that requires balance. You can adjust the seasoning, add herbs, or introduce new ingredients to achieve the perfect taste.

Understanding how different flavors interact is key to fixing imbalances in your one-pot meal. You can experiment with various combinations to find the perfect balance of salty, sweet, and savory flavors that enhance your dish, and by doing so, you will create a truly delicious meal that you will enjoy.

Final Words

Upon reflecting on the art of creating one-pot meals, you now have the tools to craft delicious dishes with ease. You can confidently experiment with your favorite ingredients, mastering the techniques to produce mouth-watering meals. With your newfound knowledge, you’ll be able to whip up satisfying one-pot wonders that will impress your family and friends, making mealtime a joyous occasion in your home.

Same O Skip to content